Showing posts with label Zebra Rug. Show all posts

Tuesday, November 16, 2010

Woo Hoo!

My DIY Window Treatments from last week have made "Best in Show" contest.  Voting is going on now!  I'm honored!

Remember these?


Share/Bookmark

Tuesday, November 9, 2010

DIY Window Treatment Tutorial

Here is my tutorial for the latest DIY Window treatment, also known as a "mis-treatment" because this was done with NO sewing!  How can you beat that?

Before:


Some people would be fine.  But for me, something was missing.  Valance?  NO.  Cornice Board?  NO.  Jabot Swag?  NO.    I needed "weight" against that far wall, and long panels would be perfect. 

Are you needing a quick window treatment and not a lot of time?

Are you low on funds and just want something nice but inexpensive?

Do you want to "Wow" all your friends who will never believe YOU did this?

Then this tutorial is for you!  Here are the supplies you will need:


Iron
Pins
Stitch Witchery (regular or heavy weight)
ruler
scissors
cup hooks
drapery rings
Fabric
Fabric Glue (optional, for trim)

Measure your window and decide how high you want to mount your curtains.  Sometimes mounting them higher to the ceiling gives the room a nice elongated look.

We decided on a nice narrow panel, and saved on fabric.  We purchased 3 yards of 45" fabric, folded it in half, ironed it down for a seam, and then cut it in half, giving me the 2 panels.  I also wanted this pattern to show more, so I did not plan on putting the cup hooks very close together.    Keep these things in mind as you pick your fabric. 

1 yard = 36 inches
3 yards = 108 inches
108 inches = 9 feet

Don't forget to allow a little bit for your hems at the top and bottom.  The sides are going to fold down less than 1/2 inch, so rarely impact your yardage requirements. 


I ironed my fabric in half and cut down the entire length, giving me 2 panels.


This is a big TIP for you - have you ever had trouble deciding which was was "UP" on your fabric?  You can often look at the selvage area (the white edge) and you will see an arrow showing which way is up.  Take pins or safety pins and mark on all panels so you won't forget as you move along, losing the selvage as a guide.

Some people trim off the selvage area before starting, so be sure to check for this arrow before you do that.  I knew I could just fold the selvage down as a the side hem, so I left it.


Here I put a pin in out of the way so I could remember which was was "up".


Take your handy dandy Stitch Witchery and lay down along the edge, where you will be folding over and ironing down.


You do not need to double fold your edge.  Just fold it over and iron down ON TOP OF the Stitch Witchery.  The Stitch Witchery will melt and become glue-like, holding your fabric.  Keep the Stitch Witchery within the fabric so it doesn't get on your iron.  This takes literally seconds.  Do this the length of your panels on both sides.  (So 4 total - with 2 panels)  It did not take me 20 minutes to do all 4 sides.


This view shows the top of one panel, with the sides done. 


I folded down about an inch and a half for the top hem as you can see.  I put a pin on the side, to line up the edges for when I use the Stitch Witchery again for the hem.  You want these even and not overlapping.  

After I hem down the top edges on both panels, we are ready to hang. 

Here we hung the cup hooks about 10 inches apart and put the drapery clips on the fabric.  I wasn't sure at this point if we were going to add any solid brown panels, or trim, so here are some things we tried, using pins (temporary).

See how much shorter that brown panel made the curtain panel look?


For this trial of the solid brown fabric, I literally just put a piece of fabric under the drapery hooks, not hemmed or anything.  Just wanted an idea. 


Did I want the trim about this far down?


How about a double row?


I tried different things - and finally decided on one row of the gimp trim at the top.  Doing all this with pins saves tons of time not having to redo things later.  

Before taking the panels down, we marked the bottom for the hem to save a step.


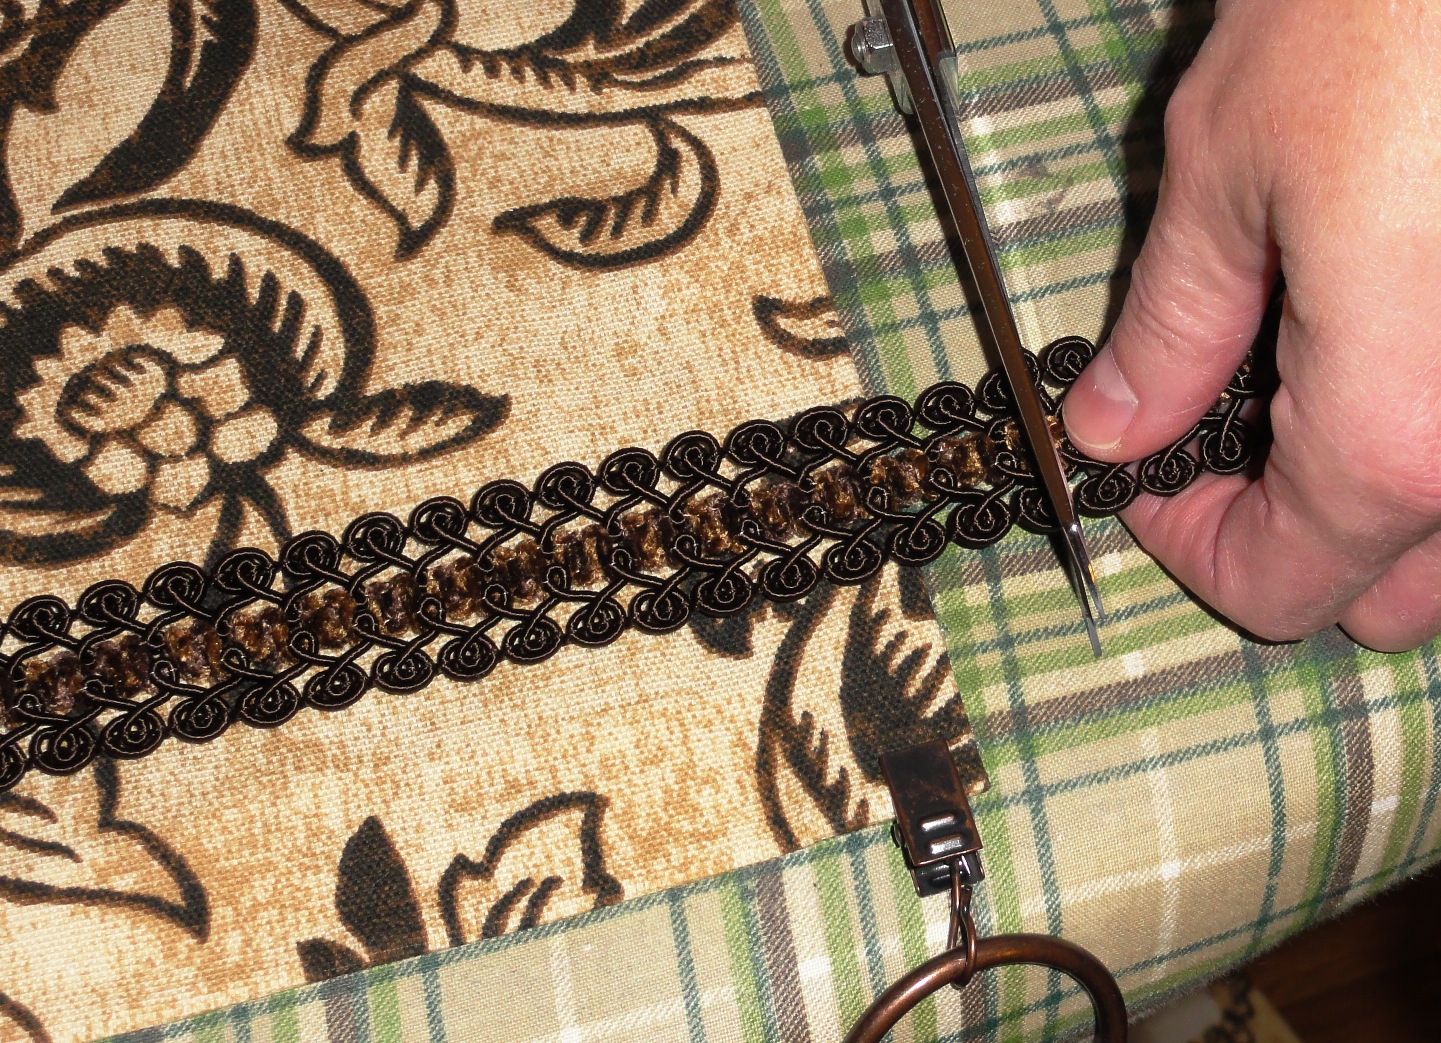
 Lay your trim down in the desired spot, leaving some at the edges to roll under to avoid fraying.


I put paper towels down in case the glue dripped, protecting the ironing board cover and fabric.


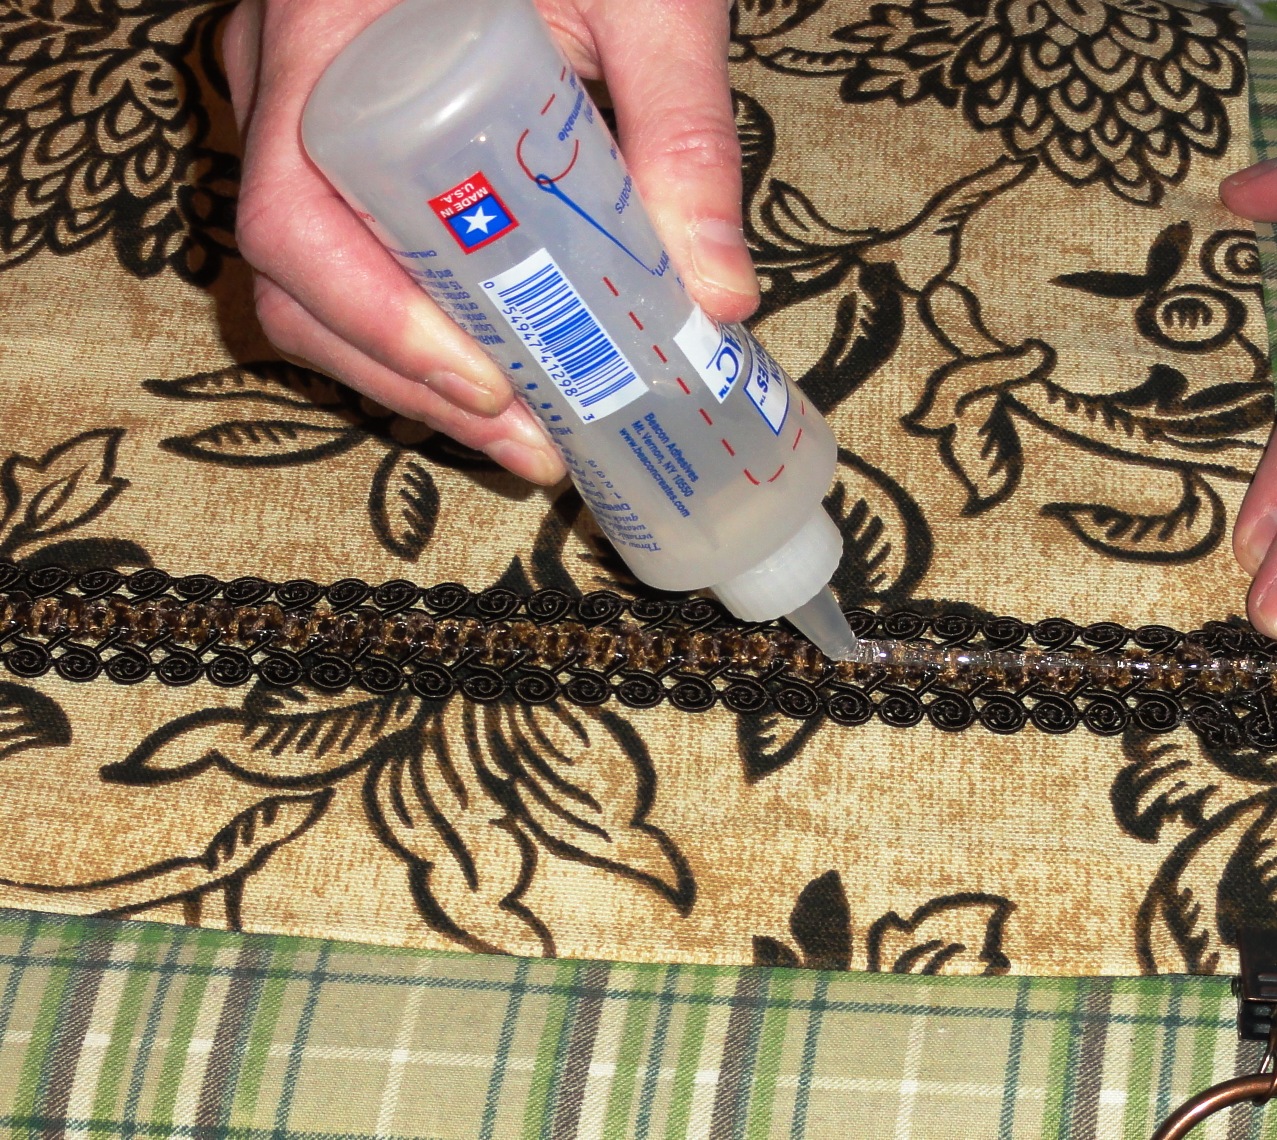
Put glue on the very edge and roll under.


Use a ruler to place the trim - I love using this type of ruler as it has a marker that stays in place where you choose.  I used this to place the trim all across the top so it was even.  Putting glue every so often.


Once the trim was glued down and set, I worked on the hem.  Because we are in a rental and may move, I wanted to leave some flexibility in these curtains.  Instead of chopping off the excess, I decided to keep it and just hem it this way.  It is undetectable and gives me choices in the future.


Put the Stitch Witchery again under the edge of the fabric and iron down.  In seconds, Voila'!!  Panels are finished!!


After one last pressing to get all the wrinkles out, my wonderful husband helped with the installation!  (I am NOT allowed on ladders!  lol)


Before:


After


For links to other DIY Window Treatments I have done, click HERE.


Have a glorious day!

Linking to Parties on this page:  HERE

Also linking to:


Share/Bookmark

Sunday, November 7, 2010

Living Room Reveal

Well, I am finally getting around to posting these photos of our new room - the room we LOVE!! (For newcomers, we are renting this condo and are "stuck" with the colors of the walls, carpet, etc.  These walls are actually a beige, but come off sometimes butter yellow in different photos.)   If you remember, I mentioned the issue surrounding the zebra print rug I wanted and how hubs misunderstood the concept?   HERE   

So, I looked around and realized I had never posted a full photo of the living room at all - in all it's beige on beige on beige self!  Beige carpet, beige walls, beige furniture.  For ALL who know me, beige is NOT one of my colors!  lol


As you can tell, I really cleaned up prior to taking that photo!  lol

So, we knew we loved the rug but what else to do in the room?  These chairs had seen better days (when we had a home theater in a former home), weren't reclining that great and the kicker?  They were TEN FEET LONG!  (I worked my Craigslist magic and sold them for $400 cash in one day, almost exactly half the cost of the new set and we still have another couch to sell!!  Woo Hoo!!)  Those chairs look nice but were loosy goosy, wouldn't hold their position and after years of abuse from the boys, weren't fun to sit in and I couldn't even get in and out of them without assistance.  Not working!

So are you ready?  Are you ready to see the furniture set we sat in for over 18 months EVERY SINGLE TIME we went to Sam's Club?  And then sat in reclining sofa sets all over the Mid South for the last 6 months - with our new frugal ways, taking months and months to decide on what to buy, being ever so sure?  And then, when we finally purchased it, my wonderful hubs got them down an additional $100 bucks? 

TA DA:


Andy is SO happy - he got his reclining furniture in his beloved dark chocolate leather!  That reclining (on both ends) sofa and recliner were a steal of a deal - we got $100 off the already low price AND once we sell our old red couch this set will have cost us...........$200.  Wowza!!

Now, for the astute out there - I'm sure you noticed the oddly placed refrigerator in the kitchen and I explained HERE that we have 3 refrigerators - 2 in our kitchen and 1 in the garage.  One refrigerator has the ice where I can reach it and the other one has the food where I can reach it.  No, that is seriously the truth BUT we didn't buy a refrigerator just for that.  See, that lovely fridge in that photo was not cheap - a cabinet depth beauty that my engineer hubby HAD to have at a former house and I'll be darned if we're gonna sell it for cheap.  That puppy is coming with us!  So, in this large galley kitchen, we are making use of it, helping my "can't bend, lift or twist" limitations.   LOL  Only us......


Now, back to the living room.  What else do you sharp-eyed devils see?  Perhaps......my new internet "station"?  Remember this photo from when we had just moved in?


Oh the horror!  We had to use plywood to get the wheels to scoot.  See, I live in that chair - fully reclined most days... to keep pressure off my severely damaged S1 nerves on both legs.  But, my goodness - could that look any worse?  And the color - BEIGE DEATH!  lol

So I want you to notice the new set up!   I had big plans of painting the plywood to blend in with the new rug when Andy remembered we could take off the wheels of the adjustable laptop desk and leave it stationary!  With me in the end of the sofa instead of the stand alone recliner, I don't need to worry about "rocking" and movement.  Genius!  Can you even SEE my table and laptop??


How about that!  Shouldn't we get a "most improved" award or something.  lol

Now, because this post isn't long enough, one thing is missing.....see that bare window back there?  I think it's time for another Window Mistreatment!!  Yes, it is!!


I will be adding a tutorial very shortly on not only HOW to do that window mistreatment, but the thought process behind picking the fabric, trim, etc.

Remember this view of the sunroom (now Ryan's unplanned bedroom)?


Well, THAT was just not going to do.  (See that red couch we are selling soon.)  I found a set of drapes for $14.99 at Burlington Coat Factory, lined drapes!  Got a shower curtain rod and used my favorite Stitch Witchery to hem the drapes to the perfect length.  Voila'!  Privacy for Ryan!


That white/blue orb is from the camera, and probably not a visiting ghost.  lol

I've read recently online about so many bloggers who are jazzing up their homes but have a moratorium on reclining furniture and just aren't going to allow it in their home.  Well, folks...that's not us.  My husband had been dreaming of dark leather reclining furniture for years and I'm just not gonna tell this hard workin' man he can't have his comfy preferences.   For now and probably forever - comfort it is!

Want a new look but don't know where to start?  In my real estate days, I told all my clients - find THE rug, the rug you LOVE.  Everything will fall into place after that.  And here is my latest proof of that.  *Check back for detailed instructions on the newest window mistreatments!  Now sewing required!


P.S.  Do you know why I finally got this posted tonight?  We started putting up our Christmas tree today!!  Since we can't travel this year due to hubby's work schedule, we're doing up the decorations full swing this year...haven't done that in quite a while.  Of course, photos to come.


Have a glorious day!

 SPOTLIGHT YOURSELF


Share/Bookmark

Monday, October 11, 2010

Sneak Peek

Finally getting around the post this - 

In the last 6 weeks, we have learned just exactly why all 3 guys in my life are super literal....how language really matters.  Well, I've been saving for 2 years for a zebra print rug, but did not realize that despite showing hubs multiple examples, he still thought I wanted one of these:

Zebra Skin Rug

No......sweety.  THIS is what I had in mind.

So after it was special ordered at a fantastic price by a hole in the wall home decor center we found, it turns out that the guys?  They "see" rivers of water instead of zebra print, so hey!!  Whatever works!!  Hubs also loves the different textures.....surprisingly, he seems to love the rug as much or more than me.  Definitely unexpected.


More pictures to come....


Share/Bookmark