
Here is my tutorial for the latest DIY Window treatment, also known as a "mis-treatment" because this was done with NO sewing! How can you beat that?
Before:

Some people would be fine. But for me, something was missing. Valance? NO. Cornice Board? NO. Jabot Swag? NO. I needed "weight" against that far wall, and long panels would be perfect.
Are you needing a quick window treatment and not a lot of time?
Are you low on funds and just want something nice but inexpensive?
Do you want to "Wow" all your friends who will never believe YOU did this?
Then this tutorial is for you! Here are the supplies you will need:

Iron
Pins
Stitch Witchery (regular or heavy weight)
ruler
scissors
cup hooks
drapery rings
Fabric
Fabric Glue (optional, for trim)
Measure your window and decide how high you want to mount your curtains. Sometimes mounting them higher to the ceiling gives the room a nice elongated look.
We decided on a nice narrow panel, and saved on fabric. We purchased 3 yards of 45" fabric, folded it in half, ironed it down for a seam, and then cut it in half, giving me the 2 panels. I also wanted this pattern to show more, so I did not plan on putting the cup hooks very close together. Keep these things in mind as you pick your fabric.
1 yard = 36 inches
3 yards = 108 inches
108 inches = 9 feet
Don't forget to allow a little bit for your hems at the top and bottom. The sides are going to fold down less than 1/2 inch, so rarely impact your yardage requirements.

I ironed my fabric in half and cut down the entire length, giving me 2 panels.

This is a big TIP for you - have you ever had trouble deciding which was was "UP" on your fabric? You can often look at the selvage area (the white edge) and you will see an arrow showing which way is up. Take pins or safety pins and mark on all panels so you won't forget as you move along, losing the selvage as a guide.
Some people trim off the selvage area before starting, so be sure to check for this arrow before you do that. I knew I could just fold the selvage down as a the side hem, so I left it.

Here I put a pin in out of the way so I could remember which was was "up".

Take your handy dandy Stitch Witchery and lay down along the edge, where you will be folding over and ironing down.

You do not need to double fold your edge. Just fold it over and iron down ON TOP OF the Stitch Witchery. The Stitch Witchery will melt and become glue-like, holding your fabric. Keep the Stitch Witchery within the fabric so it doesn't get on your iron. This takes literally seconds. Do this the length of your panels on both sides. (So 4 total - with 2 panels) It did not take me 20 minutes to do all 4 sides.


After I hem down the top edges on both panels, we are ready to hang.
Here we hung the cup hooks about 10 inches apart and put the drapery clips on the fabric. I wasn't sure at this point if we were going to add any solid brown panels, or trim, so here are some things we tried, using pins (temporary).
See how much shorter that brown panel made the curtain panel look?

For this trial of the solid brown fabric, I literally just put a piece of fabric under the drapery hooks, not hemmed or anything. Just wanted an idea.

Did I want the trim about this far down?

How about a double row?

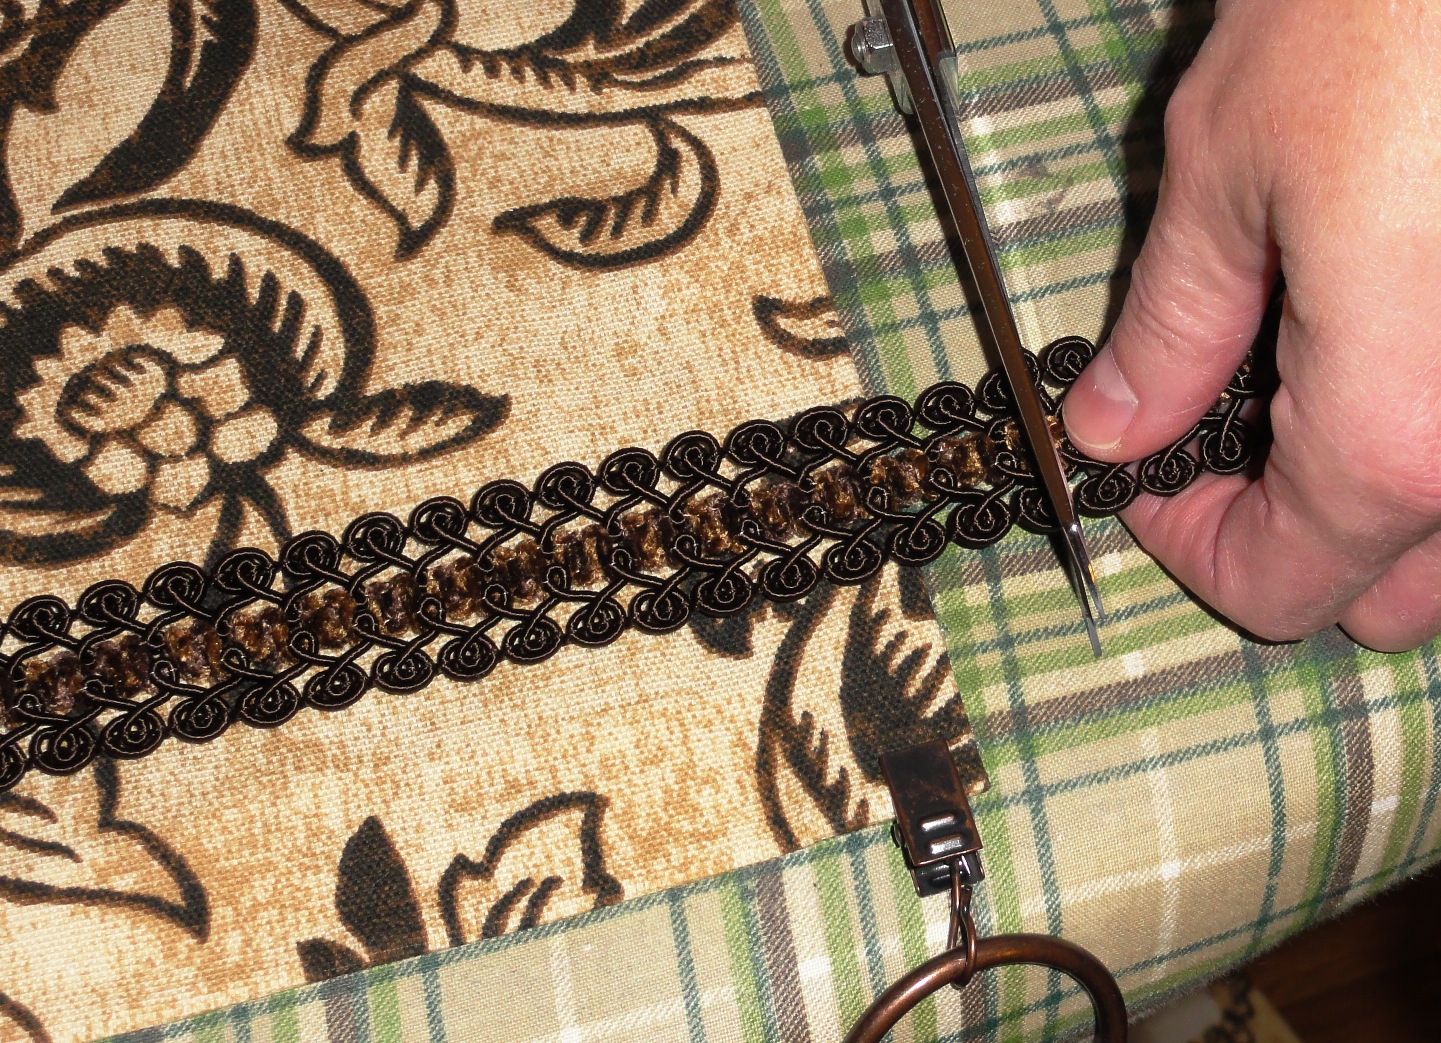
I tried different things - and finally decided on one row of the gimp trim at the top. Doing all this with pins saves tons of time not having to redo things later.
Before taking the panels down, we marked the bottom for the hem to save a step.


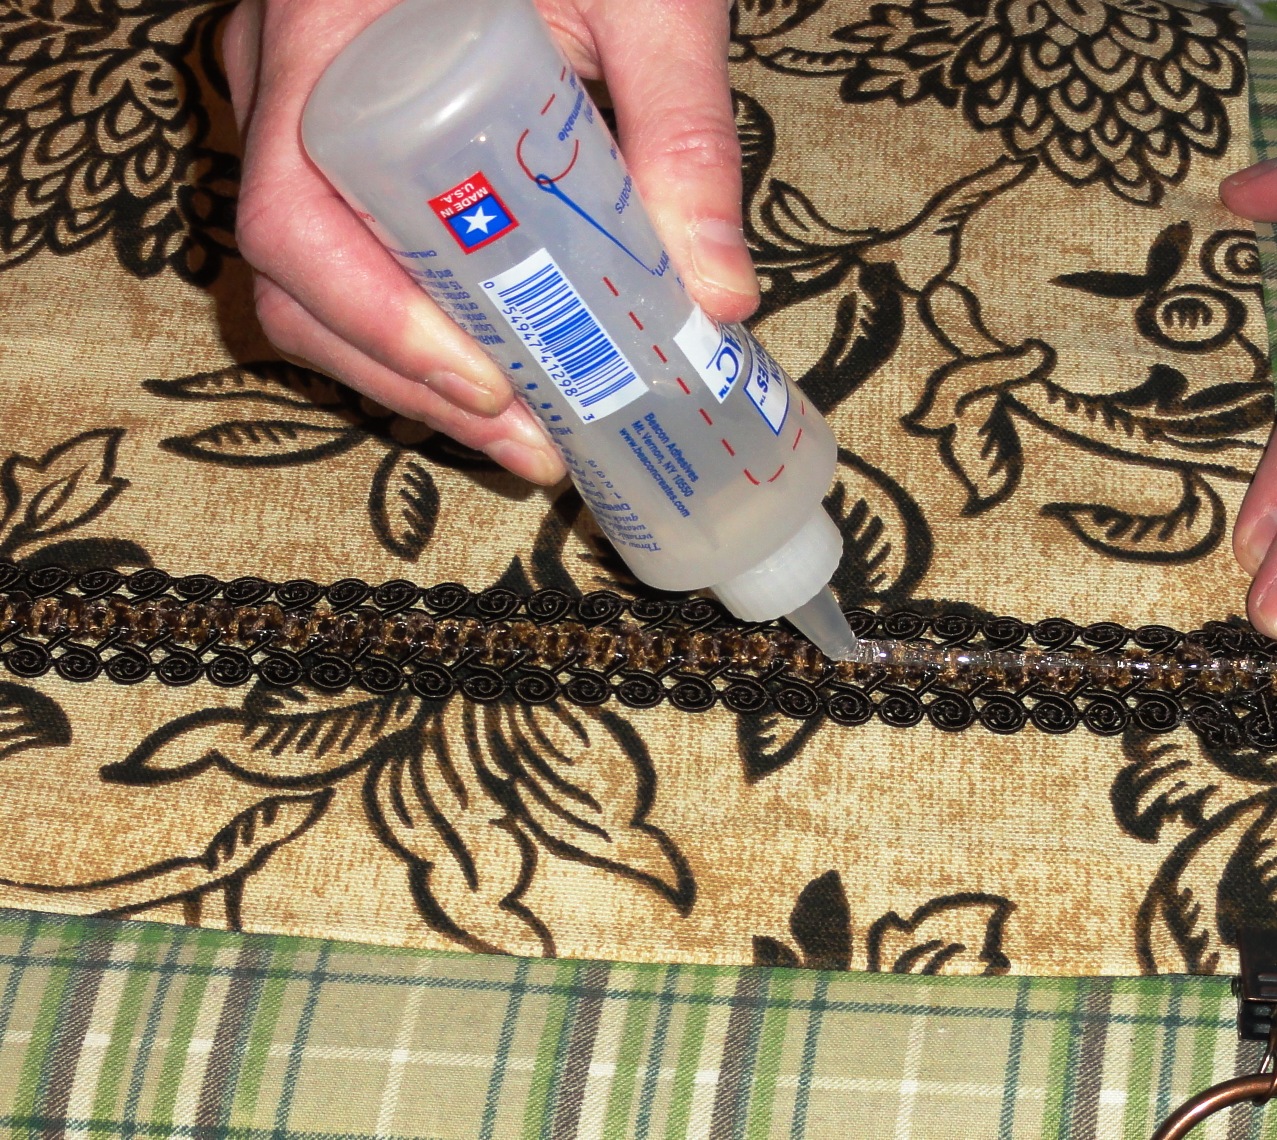
I put paper towels down in case the glue dripped, protecting the ironing board cover and fabric.

Put glue on the very edge and roll under.

Use a ruler to place the trim - I love using this type of ruler as it has a marker that stays in place where you choose. I used this to place the trim all across the top so it was even. Putting glue every so often.

Once the trim was glued down and set, I worked on the hem. Because we are in a rental and may move, I wanted to leave some flexibility in these curtains. Instead of chopping off the excess, I decided to keep it and just hem it this way. It is undetectable and gives me choices in the future.

Put the Stitch Witchery again under the edge of the fabric and iron down. In seconds, Voila'!! Panels are finished!!


Before:
After

For links to other DIY Window Treatments I have done, click HERE.
Linking to Parties on this page: HERE
Also linking to:


That is wonderful and what a fantastic tutorial...I do believe I could handle this one! Thanks for the inspiration.
ReplyDeleteThat looks great. What a difference. My party is actually called Before and After. My title for my post is boring to beautiful. I thank you for sharing your window mistreatment at my party. I have used that glue for sticking trim on pre made panels and on lampshades. Love that stuff.
ReplyDeleteGreat tutorial and idea....looks wonderful! ~Liz, your newest follower! =)
ReplyDeleteLooks wonderful, great tutorial, bravo:))
ReplyDeleteGreetings from Biljana
Cheri,
ReplyDeleteI just love this super easy treatment...it looks GREAT!!!!
Blessings,
Linda
I almost forgot to tell ya...I'm drooling over that awesome rug in your den and I'm your newest follower:)
ReplyDeleteBlessings,
Linda
Cute! Excellent job! And great instruction!
ReplyDeleteYou should come link this up to my weekly Thursday Making It With Allie Link Party! I think it would make a Fabulous addition!
AllieMakes.Blogspot.com
How beautiful! What a great tutorial. I love the fabric you chose and have NEVER noticed the "up" arrow on the selvage. I'll be looking for it. Thanks for linking :).
ReplyDeleteThis is gorgeous and a great tutorial!
ReplyDelete~Renee @ Shabby, Chic & Charming
Well done! The fabric is amazing and it looks great in you room.
ReplyDeleteLove love love the fabric and even better that there is no sewing : )
ReplyDeleteOh, what a difference your new curtains make! You did a great job and I love the fabric! Thank you for the wonderful tutorial too.
ReplyDeleteBe a sweetie,
Shelia ;)
Just the perfect accent for that window.LOVE that it is no sew (I sew, but hauling out that machine...yikes!). Happy weekend. I am a new follower.
ReplyDeleteHolly
504 Main
Great tutorial, thank you!
ReplyDeleteI am your newest follower from desig it chic's bloghop! :)
It looks great. Isn't it nice to have a handy hubby? I love mine too!
ReplyDeleteI'm just popping in from the Friday hop & I'm now following your lovely blog. Please stop by when you get a chance!
living well, spending less
Wow, no sewing....I'm impressed. :P Great job!
ReplyDeleteI love that you didn't install a curtain rod - that looks like your curtains are just floating on the wall. Very cool effect! And - your extra material at the bottom helps give the curtains some weight to hang right. Great tip about that!
ReplyDeleteI'm your newest follower from the Friday Blog Hops! Come check out my blog at: http://adventuresofathriftymommy.blogspot.com/
ReplyDeleteHave a great Day!
Hi, Cheri - that is such a fantastic and easy window makeover! I love how you showed the less-successful brown fabric version - it really made me think. Thanks for the great tutorial full of great tips!
ReplyDeleteso cute! i love that you did it all with no sewing required!
ReplyDeleteI love your drapes! Thanks so much for the great tutorial.
ReplyDeleteVery pretty, Cheri! I love the pattern!
ReplyDeleteJust stopping by from Fabulous Friday Party!! Looks great and I can't believe it wasn't any sewing! Love the material!
ReplyDeleteVery pretty! :0)
ReplyDeleteThanks for visiting my blog. I was glad to find you as a follower. :0)
ReplyDeleteI love the fabric you chose (and I love leather seating too.) The fabric really helps to soften your window and blinds. Great job.
ReplyDeleteThanks for stopping by and becoming a follower. I'm following you too.
Stitch Witchery and hot glue! Yay! I think I might just be able to pull this one off! lol
ReplyDeleteLooks just great, Cheri! What a good boy Andy is to help out. I can't complain though, T does too! Have a great weekend!
Blessings,
M.
great tutorial, very detailed, thanks!!
ReplyDeleteHere from boost my blog, have a happy weekend!
You are adorable and I've loved looking around here on your blog! Thank you for becoming a new follower! I'm going to follow you as well!
ReplyDeleteVery well done and thanks for the great tutorial. Window treatments scare me because they are so seemingly permanent, particularly after taking the plunge and making a substantial investment. That's why after five years, I still have very few in my house. You've inspired me.
ReplyDeleteI am your newest follower from the blog hop The Mommy Chronicles
ReplyDeleteLove the way you installed these with the hooks! Totally fabulous fabric and LOVE the no sew!! Wonderful job!
ReplyDeleteThe fabric you chose is the perfect touch to soften your living room. Well done on getting the drapes done without sewing.
ReplyDeleteWow this turned out amazing! I love the detail on the curtains.
ReplyDeleteThanks for linking up. And don't forget to enter my along for the ride: designs giveaway! http://bit.ly/9cz33f
I can't believe you made these beautiful curtains without any sewing! They look so fantastic :)
ReplyDeleteWow--I never knew that about finding the up sign on the selvedge edge! I can see that you link to a lot of parties--would you consider one more? I wonder if you would share this on my blog's new Tell Me Tuesday link party! http://vintagepollyanna.blogspot.com/2010/11/join-me-on-tuesdays-for-new-link-party.html
ReplyDeleteThis is amazing... great idea and they look super expensive Thx so much for joining us at A Crafty Soiree!
ReplyDeleteThanks for linking up with Sweets This Week :)
ReplyDelete~Sarah
These look very nice! Great work! Thanks for linking up for Friday Favorites! Hope you'll link up with us again this week!
ReplyDeleteGreat tutorial and I love the punch of pattern in your room! Thanks for linking to SFS! -shaunna :)
ReplyDeleteThose are great. Love the fabric.
ReplyDeleteUm, Wow, this was awesome. Shoot, with such incredible tutorials, I almost feel like I just took a class. This was so detailed. Thank you for showing us every step of the way, how to do this.
ReplyDeleteI also host a weekly party and girl, add me to that list of your's, pLEASE,,, I want some of your TUTORIALS on my blog too.
The party lasts all week, every week, with a new one starting every Tuesday, **Amaze me August**, hope to see you there.
Bella:)
LOVE, LOVE the cup hooks for hanging the curtains. Where did you find them--can't find any like that around here ( antique bronze color ) Thanks. Cathy
ReplyDeleteHi - we got the cup hooks at Walmart! Thanks for visiting!
ReplyDeleteWow, that looks great, I love how it accents your fun zebra print rug!
ReplyDeleteladybirdln.blogspot.com
thanks for the tutorial. It was really helpful.
ReplyDeleteiomjerm730
ReplyDeletegolden goose outlet
golden goose outlet
golden goose outlet
golden goose outlet
golden goose outlet
golden goose outlet
golden goose outlet
golden goose outlet
golden goose outlet
golden goose outlet